TeslaCam FAQs
Your TeslaCam questions, answered.
Still Need a TeslaCam Drive?
Common Questions about Functionality
Using TeslaCam
Dashcam and Sentry Mode recording works with Tesla vehicles manufactured after August 2017 (and some at the end of August 2017).
Your vehicle must have AP2.5 hardware or later to record viewable videos to a USB drive.
AP 2.0 Hardware is currently not fully supported (but stay tuned as that may change).
Each drive has been pre-formatted to work with your Tesla “out of the box.” It has also been tested in a Tesla to ensure proper functionality.
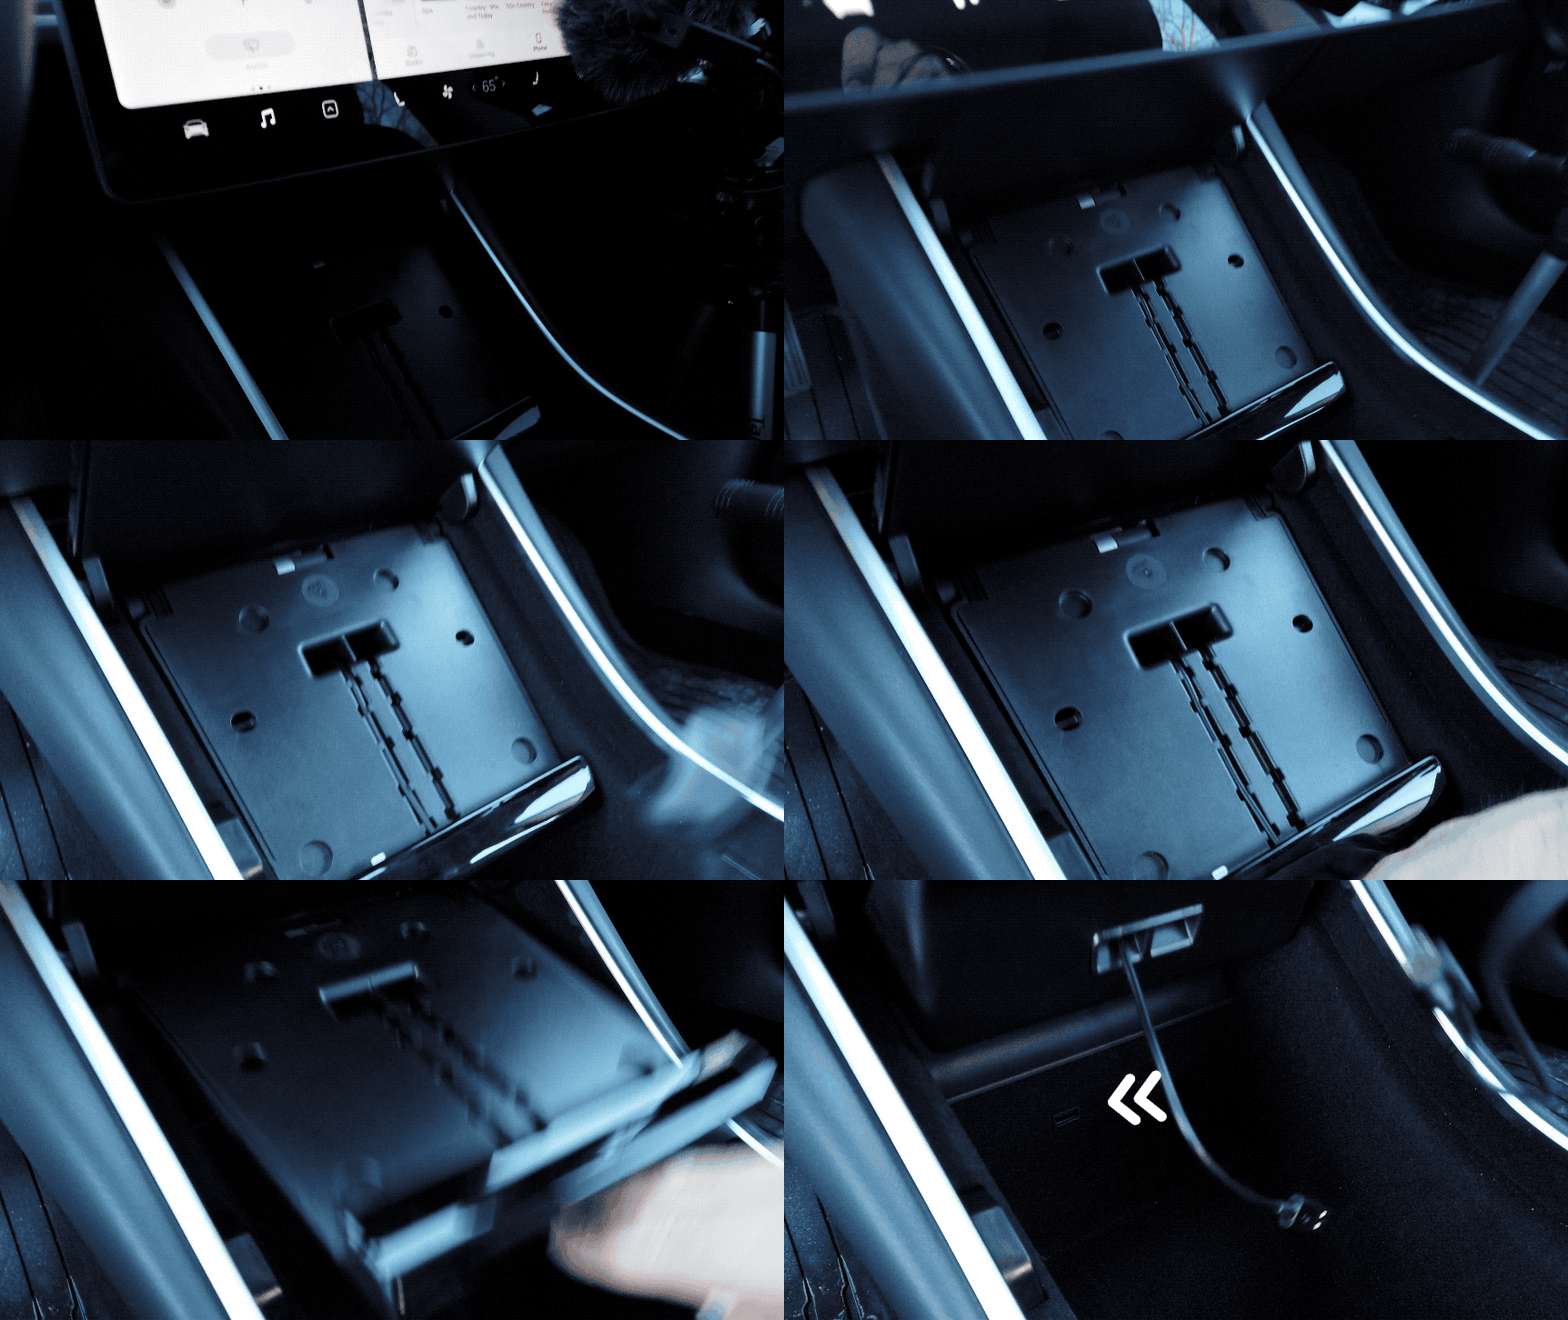
Simply remove the USB reader from the package and plug in to your Tesla's USB port.
Note: Rear seat USB ports in the Model 3 will NOT work for DashCam. It must be inserted into one of the center console ports.

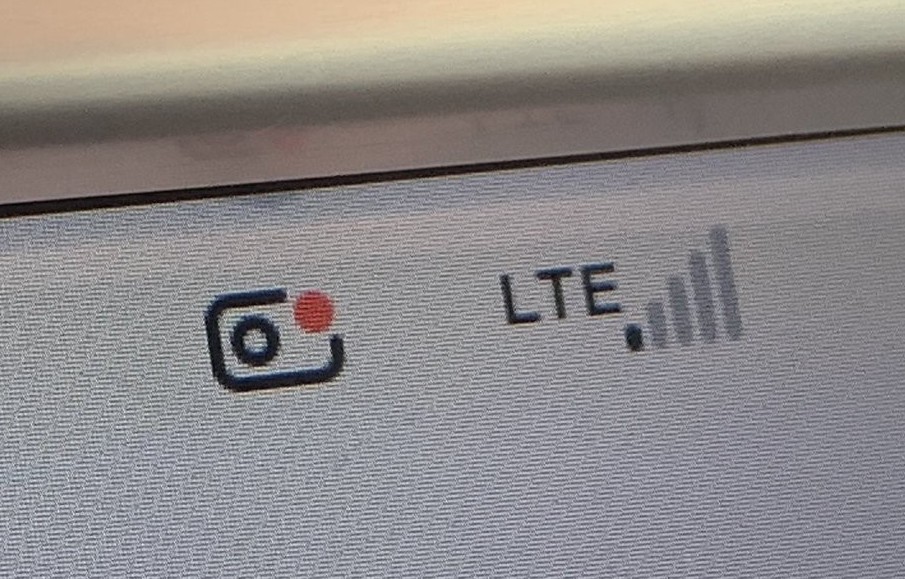
Once inserted, you will see the camera icon appear on your center screen with a red dot in the upper right corner. (below)
When removing your USB drive from your Tesla, treat it like you would a USB drive attached to your computer. Follow this process each time:
- Tap and hold the camera icon with the red dot until you see a white pulse come from that icon.
- Once the icon dot turns gray, it is no longer recording and is safe to remove the drive.

Removing it using this method helps ensure that your files do not get corrupted.
Always remember to properly eject the drive from your computer when connected. Failure to do so may corrupt the drive and render it not usable with Dashcam until reformatted.
When you want to save footage during a drive, simply tap the DashCam icon (camera with a red dot).
Here's some basic information you should know:
- Tapping the icon saves the last ten minutes of recorded footage.
- The front, left, and right cameras save footage when the icon is tapped.
- Video files are saved in a folder called SavedClips, each one minute long.
- In the current version of the software there is a bug where sometimes the video is distorted or even corrupted. That is a vehicle software issue and not your drive.
- In the current version of TeslaCam there is a chance that your drive may get corrupted due to a incompletely written file. If this happens to you, this fix will likely get you up and running.
When you enable Sentry Mode from your Security menu or from the Tesla app, your cameras start recording. Here's some basic info:
- When your Tesla detects a potential threat, it will record footage from the front, left, and right cameras to your SavedClips folder on your USB Drive.
- Your USB Drive must be inserted into the car to record footage.
- Sentry Mode footage will not clear itself from the drive. You should regularly review and delete the footage from your USB Drive to maintain enough space to allow for proper functionality.
Under the Safety & Security menu in your Tesla, you can adjust the following:
- Sentry Mode on or off by default when parking.
- The ability to turn on Sentry Mode but exclude specific locations (Home, Work, Favorites).
When returning to your Sentry Mode enabled car, it may display that a number of Sentry Mode events took place. You can review these events by plugging your drive into a computer or compatible device.
Sentry Mode recordings are automatically saved in SavedClips until you delete them.
To save Dashcam footage, tap the camera icon with the red dot to save the last 10 minutes of recorded footage to the drive. This is saved to your SavedClips folder on the drive.
Approximately one hour of latest driving footage is saved to the RecentClips folder of the drive. This footage overwrites itself to only maintain one hour of the most recent footage available.
Sentry Mode alert footage is saved automatically to your SavedClips folder on the drive.
At this time you cannot view the footage on your car's screen. You will need to safely eject the drive from your car and use your computer or compatible device to view the footage. It works like any other USB Flash Drive you've used.
If you delete footage from the drive while reviewing, make sure you empty the trash on your computer with the drive connected.
It is recommended that you use VLC Player if you are having trouble getting the videos to play properly.
Common Questions about Troubleshooting
Troubleshooting TeslaCam
Check that the USB drive is fully inserted into the front USB ports (rear ports do not work for DashCam). Try unplugging and then plugging back in your drive. Wait 10-20 seconds and it should appear.
If it does not appear, you likely got a corrupted file in your drive that is now making it unreadable. This is not uncommon with the current version of TeslaCam and Tesla is working on fixing it. Deleting the TeslaCam folder and recreating it will likely solve your problem.
Follow these steps:
- Plug in the drive to your computer.
- Copy any footage you want to save to a file on your computer and then delete the TeslaCam file (and empty the trash with drive connected).
- Create a new folder in the TESLACAM drive titled TeslaCam (exactly as written) and then safely eject the drive.
- Plug the drive back into your Tesla.
You should see the icon appear after a moment.
A file may have gotten corrupted by the Tesla software or the drive may be full.
Make sure you are properly removing the USB drive from the Tesla and from your computer. If you delete footage from the drive on your computer, make sure you empty the Recycle Bin (Mac) or Trash (PC) PRIOR to removing the USB drive. Failure to do so can leave temporary files that can corrupt the drive and make it not readable by your Tesla.
A common fix is the following:
- Plug in the drive to your computer.
- Copy any footage you want to save to a file on your computer and then delete the TeslaCam file (and empty the trash with drive connected).
- Create a new folder in the TESLACAM drive titled TeslaCam (exactly as written) and then safely eject the drive.
- Plug the drive back into your Tesla.
You should be up and running.
No worries. Simply create a new folder in your empty drive titled TeslaCam. Deleting the folder does not affect the formatting of the drive.
Use your computer to review footage and delete videos you don't need. Save footage to your computer that you'd like to keep and then delete it from the drive.
Empty the trash on your computer while the drive is connected if you deleted footage.
Caution: DO NOT DELETE THE MAIN TeslaCam FOLDER! Doing so will make DashCam inoperable.
Make sure you are properly removing the USB drive from the Tesla and from your computer. If you delete footage from the drive on your computer, make sure you empty the Recycle Bin (Mac) or Trash (PC) PRIOR to removing the USB drive. Failure to do so can leave temporary files that can corrupt the drive and make it not readable by your Tesla.
A common fix is the following:
- Plug in the drive to your computer.
- Copy any footage you want to save to a file on your computer and then delete the TeslaCam file (and empty the trash with drive connected).
- Create a new folder in the TESLACAM drive titled TeslaCam (exactly as written) and then safely eject the drive.
- Plug the drive back into your Tesla.
You should be up and running.
Contact us here and we will get back to you shortly!
-
-26% Out of stock
-
-27%


